Chưa có sản phẩm trong giỏ hàng.
Tin tức
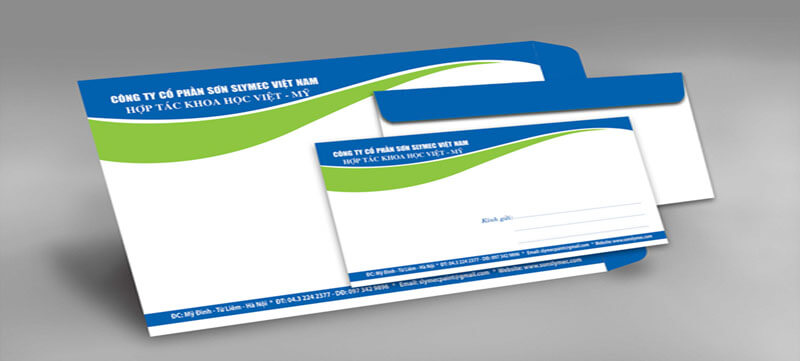
Cách in phong bì bằng máy in chuẩn khổ, đúng chiều
05
Th1
Th1
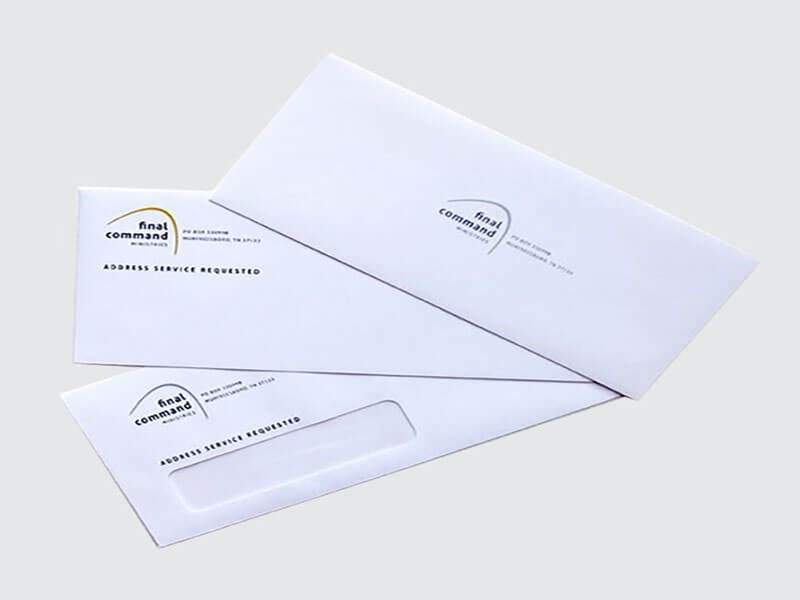
Just one wrong step in placing the tray can cause the text on the envelope to be misaligned by a few millimeters, leading to paper jams or printing upside down. This article from Toshiba Thien Bang, ” How to Print Envelopes Using a Standard Size, Correct Orientation, and Minimize Paper Jams,” summarizes the core steps for two common scenarios: office A4 laser printers and Ricoh photocopiers. The content covers everything from file preparation and size declaration to tray selection, common errors, and troubleshooting
Nội dung bài viết
- 1 Why are envelopes more prone to errors than A4 paper printing?
- 2 Printer groups capable of printing envelopes
- 3 Preparation before printing envelopes
- 4 Cách in phong bì bằng máy in laser A4 với Word
- 5 Lưu ý quan trọng khi nạp phong bì trên máy in laser
- 6 Cách in phong bì bằng máy photocopy Ricoh theo quy trình driver
- 7 Mẹo kiểm soát lệch lề trước khi in hàng loạt
- 8 Nhóm lỗi thường gặp khi in phong bì và cách khắc phục
- 9 Toshiba Thien Bang – specializing in supplying genuine photocopiers.
Why are envelopes more prone to errors than A4 paper printing?
Envelopes with glued edges and uneven thickness often have a more “unpleasant” path through the paper feed mechanism compared to flat paper. Many types of envelopes have a slightly coated surface, causing ink to adhere differently than on regular printing paper slot88ku
Another factor lies in the paper size sensor. Office printers usually accept A4, Letter, and A5 quite well, but envelopes require specific size declaration. If you ignore this step, the system is prone to misalignment and pulling the paper in the wrong direction.
Furthermore, many people insert envelopes habitually, while each printer model has a different feeding direction. Therefore, you should check the adhesive side and the feeding direction before pressing the print command.
Printer groups capable of printing envelopes
Before starting the printing process, correctly identifying the printer model being used is a fundamental but often overlooked step. In fact, each model has different paper feeding mechanisms, width sensors, and thickness handling capabilities. Therefore, even with the same goal of printing envelopes, the setup and reliability will not be entirely the same.
A4 office laser printer
These are the most popular types of printers in small businesses and administrative offices. Their major advantages include simple operation, fast printing speed, and the convenience of printing test copies before mass production
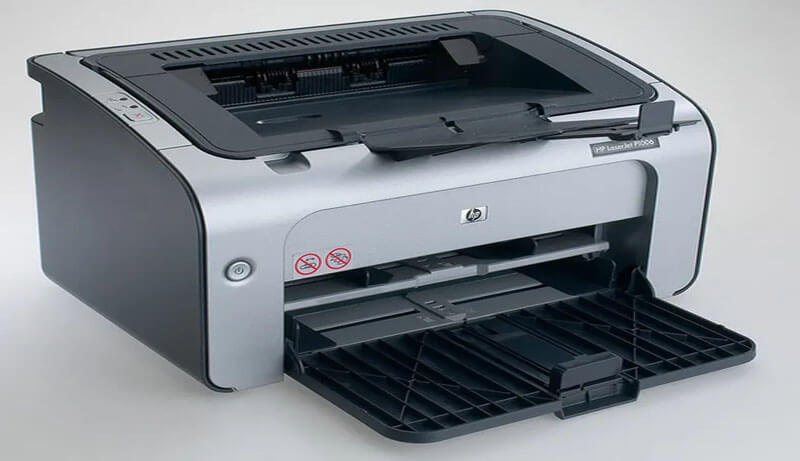
However, due to their design optimized for flat A4 paper, office laser printers are quite sensitive to envelopes with uneven thickness or stiff edges. Therefore, users need to pay special attention to envelope weight, how to position the paper, and choose the appropriate paper tray to minimize wrinkling, misalignment, or paper jams.
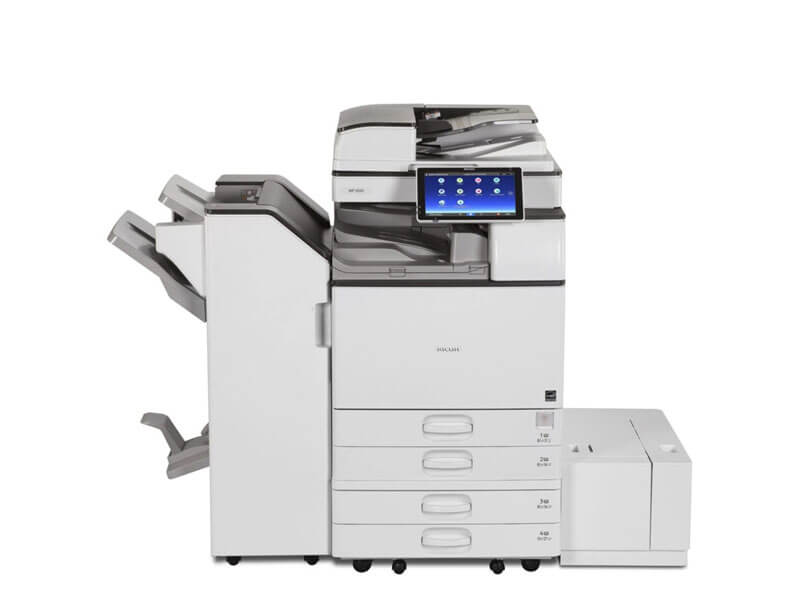
Multifunction photocopier
Compared to conventional laser printers, multifunction photocopiers often offer distinct advantages when printing envelopes. These devices allow for more flexible paper tray customization, especially the manual (Bypass) tray with its straight paper path. Furthermore, many models support custom paper size declaration directly on the control panel, ensuring good synchronization between the driver and the device. When properly set up, photocopiers offer high stability, suitable for frequent envelope printing or medium to large batch printing needs
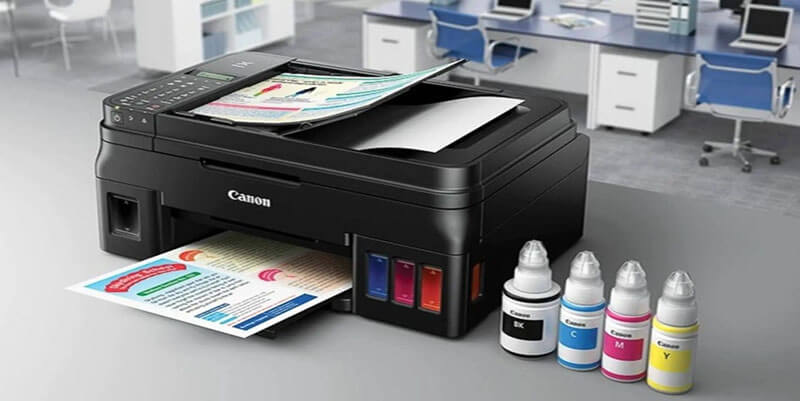
Inkjet printer
Some inkjet printers are still capable of printing envelopes, especially with thin paper and surfaces that absorb ink well. However, the drawback of this group lies in the ability to control ink drying and paper feed stability. Envelopes with smooth or lightly coated surfaces are prone to ink smudging, uneven printing, or curled edges. Therefore, if an office prioritizes stability and minimal operational errors, laser printers or photocopiers are generally easier to control.
Preparation before printing envelopes
Preparation plays a crucial role in determining the accuracy of the printed output, especially the placement of content on the envelope. In fact, most errors such as misaligned text, uneven edges, or paper jams stem from skipping these fundamental steps. Therefore, you should follow the clear sequence, avoiding shortcuts or changes in order.
Accurately measure the dimensions of the envelope blank.
You need to determine the actual width and height of the envelope using a measuring tape, instead of relying solely on the name or size printed on the packaging. Many envelopes have the same markings, but a few millimeters of error can still occur between different manufacturers or batches
After obtaining accurate measurements, compare them directly to the design file dimensions. If the file is smaller than the workpiece, the printed content tends to shift towards the center, resulting in an unbalanced layout. Conversely, if the file is larger than the actual size, the text or logo at the edges is easily cut off during printing.
Leave a safe margin for the logo and address information.
Envelopes always have a sealing edge and a folding area, which are unstable when passing through the paper feed mechanism. Therefore, you should leave a safe space around the edge, avoiding placing the contents too close to the edge. Even a slight misalignment during paper feeding can cause important text or details to be lost.
Additionally, the logo should be placed on a flat, stable surface, avoiding any curves or folds in the envelope. Curved surfaces cause uneven ink adhesion, easily resulting in a smudged or blurry print.
Choose the right paper blank and surface.
The envelope material directly affects paper feeding and ink adhesion. Envelopes that are too thick often cause uneven feeding, increasing the risk of jams or misalignment. Conversely, envelopes with overly smooth surfaces can cause ink to dry slowly, especially with laser printers.
You should prioritize blanks with a flat surface, neat folded edges, no warping, and no moisture. Choosing the right blank from the start will help ensure a more stable printing process and minimize technical errors.
Chuẩn bị bản in thử trước khi in hàng loạt
In thử từ một đến hai phong bì là bước không nên bỏ qua, dù bạn đã từng in thành công trước đó. Bản in test giúp bạn nhanh chóng phát hiện các vấn đề như sai chiều nạp, chọn nhầm khay giấy hoặc canh lề chưa phù hợp. Nhờ đó, bạn có thể điều chỉnh kịp thời mà không phải loại bỏ cả xấp phong bì.
Cách in phong bì bằng máy in laser A4 với Word
Phần này phù hợp khi bạn muốn thao tác nhanh, không cần phần mềm thiết kế riêng. Word có sẵn tính năng Envelopes, nên bạn tận dụng để tạo bố cục cơ bản.
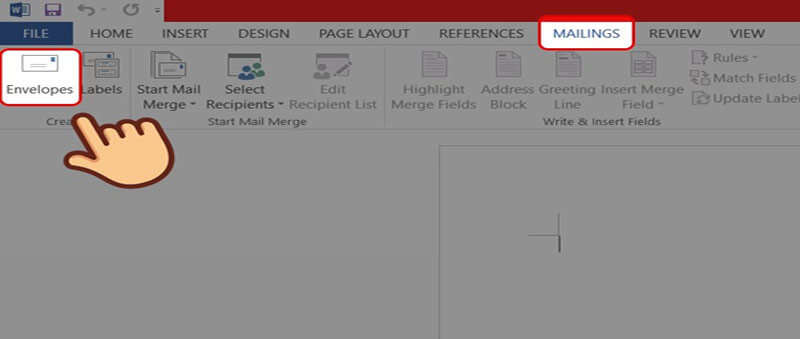
Bạn có thể bắt đầu bằng việc mở Word, sau đó vào thẻ Mailings. Tiếp theo, bạn chọn Envelopes để mở hộp thoại nhập địa chỉ.
cách in phong bì bằng máy in trong tình huống này phụ thuộc nhiều vào việc bạn chọn đúng kích thước và đúng lề.
Bước 1: Mở Envelopes và nhập thông tin
Trong hộp Delivery address, bạn nhập địa chỉ người nhận. Trong Return address, bạn nhập địa chỉ người gửi. Nếu bạn chưa in logo, bạn có thể để trống, rồi chèn hình sau.
Bước 2: Chọn Options và đặt đúng khổ
Bạn bấm Options, rồi chọn Envelope Options. Word có danh sách kích thước sẵn, nhưng nhiều phôi tại Việt Nam không trùng hoàn toàn. Khi đó, bạn chọn Custom Size, rồi nhập Width và Height theo số đo phong bì.

Bước 3: Tinh chỉnh font, vị trí, logo
Sau khi Word tạo bố cục, bạn có thể đổi font, cỡ chữ, hoặc canh lề. Nếu cần logo, bạn chèn hình ảnh, rồi kéo vào góc theo bộ nhận diện.

Bước 4: Vào Print và thiết lập khay giấy
Bạn vào File, chọn Print, rồi mở Printer Properties. Tại đây, bạn chọn đúng khay nạp, thường là khay tay hoặc khay đa năng.
Bạn cũng nên chọn loại giấy phù hợp, nếu driver có mục Paper Type. Khi chọn đúng loại, máy sẽ giảm tốc kéo giấy, nhờ đó hạn chế nhăn.
Bước 5: Đặt phong bì đúng chiều và in thử
Bạn đặt phôi vào khay, canh thẳng, rồi chặn cữ giấy cho sát. Bạn in thử 1 chiếc, sau đó đo lại vị trí chữ. Nếu cần, bạn chỉnh lề trong Word, rồi in lại.
Lưu ý quan trọng khi nạp phong bì trên máy in laser
Mỗi máy có hướng nạp khác nhau, nên bạn nên làm theo nguyên tắc “test rồi mới chạy lô”. Dưới đây là vài điểm giúp bạn giảm rủi ro.
- Không nhét quá nhiều phong bì vào khay.
- Không dùng phong bì bị cong hoặc bị ẩm.
- Canh cữ chặn sát mép, tránh lệch hướng kéo.
- Tránh chạm tay vào vùng in, nhất là với phôi trơn.
Nếu máy có khay đa năng, bạn ưu tiên khay này. Khay đa năng thường hỗ trợ giấy dày, đồng thời ít uốn cong đường đi của phôi.
Cách in phong bì bằng máy photocopy Ricoh theo quy trình driver
Với Ricoh và nhiều máy photocopy tương tự, bạn thường cần khai báo khổ tùy chỉnh ở driver, rồi khai báo thêm tại màn hình máy. Khi hai bên khớp nhau, bản in sẽ ổn định hơn.
Phần dưới đây bám sát logic thao tác mà bạn đã cung cấp, nhưng trình bày lại theo hướng dễ áp dụng.
Bước 1: Đối chiếu kích thước phôi với file
Bạn đo lại chiều dài, chiều rộng phong bì, rồi so với file thiết kế. Nếu file là PDF, bạn kiểm tra kích thước trang trong phần Document Properties.
Nếu file là thiết kế từ AI hoặc Corel, bạn kiểm tra Artboard. Khi Artboard sai, driver dù đúng vẫn không cứu được.
Bước 2: Khai báo Custom Paper Size trong driver
Trên Windows, bạn mở Control Panel, rồi vào Devices and Printers. Bạn bấm chuột phải vào máy Ricoh, sau đó chọn Printer Properties.

Trong mục Advanced hoặc Paper Settings, bạn tìm tùy chọn Register Custom Paper Size. Bạn đặt tên khổ giấy, rồi nhập Width và Length theo kích thước phong bì.
Bạn bấm Modify, rồi lưu lại. Khổ này sẽ xuất hiện khi bạn chọn Document Size ở lệnh in.
cách in phong bì bằng máy in theo hướng driver sẽ dễ kiểm soát hơn, vì khổ tùy chỉnh luôn có sẵn cho lần sau.
Bước 3: Khai báo khổ trên màn hình máy Ricoh
Tại màn hình máy, bạn vào User Tools. Sau đó, bạn tìm Tray Paper Settings để chỉnh khay.
Bạn chọn khay định dùng, có thể là Tray 1, Tray 2, hoặc Bypass. Bạn chọn Custom Size, rồi nhập kích thước đúng như phần driver.
Nếu phong bì dày, bạn vào Paper Type, rồi chọn Thick Paper 1 hoặc Thick Paper 2, tùy định lượng. Khi bạn chọn chế độ dày, máy thường kéo chậm hơn.
Bước 4: Đặt phong bì vào khay đúng chiều
Bạn quan sát mặt có keo dán, rồi đặt theo hướng mà máy yêu cầu. Với nhiều dòng, mặt có keo thường hướng lên, nhưng bạn vẫn nên test vì có biến thể.
Bạn ưu tiên đặt theo chiều dọc nếu phong bì lớn. Khi đặt dọc, vùng in ít bị chạm mép hơn.
Bước 5: In từ file và chọn đúng khay
Bạn mở file thiết kế, bấm Print, rồi vào Properties. Tại Document Size, bạn chọn đúng khổ custom vừa tạo. Tại Input Tray, bạn chọn đúng khay đã khai báo.
Bạn bấm OK, rồi in thử 1 chiếc. Nếu lệch, bạn chỉnh trong file hoặc trong mục Image Shift, nếu driver hỗ trợ.
Mẹo kiểm soát lệch lề trước khi in hàng loạt
Lệch lề thường đến từ ba điểm: file, driver, hoặc nạp giấy. Bạn cần khoanh vùng, rồi xử lý từng phần.
- Nếu chữ lệch đều mọi bản, nguyên nhân thường nằm ở file hoặc lề.
- Nếu chữ lệch lúc có lúc không, nguyên nhân thường nằm ở nạp phong bì.
- Nếu chữ lệch theo một chiều, bạn kiểm tra cữ chặn khay.
Bạn nên ghi lại thông số lề đã ổn, để lần sau dùng lại. Việc ghi chú giúp đội khác in đúng, dù không phải người set ban đầu.
Nhóm lỗi thường gặp khi in phong bì và cách khắc phục
Đây là phần nhiều bài hướng dẫn bỏ qua. Trong khi đó, người dùng lại vướng lỗi đúng lúc gấp nhất.
Kẹt phong bì trong máy
Bạn dừng lệnh in, rồi kéo phong bì theo hướng dẫn trên máy. Bạn tránh giật mạnh, vì có thể rách phôi, rồi dính vụn giấy trong cụm kéo.
Sau đó, bạn kiểm tra phôi còn lại. Nếu phong bì cong, bạn thay xấp khác. Bạn cũng giảm số lượng đặt trong khay.
Bạn có thể chuyển sang khay Bypass. Khay Bypass thường đi đường giấy thẳng hơn, nên giảm nguy cơ kẹt.
In bị ngược mặt hoặc xoay chiều
Bạn in thử, rồi đánh dấu một góc phong bì. Nhờ dấu đó, bạn xác định hướng nạp chuẩn.
Bạn cũng kiểm tra phần Orientation trong lệnh in. Nếu file đang Portrait mà driver hiểu Landscape, bản in sẽ xoay.

In lệch trái, lệch phải
Bạn kiểm tra cữ chặn khay, rồi chỉnh sát mép phong bì. Bạn cũng kiểm tra lại kích thước custom trong driver.
If the margins in Word are misaligned, adjust them in Envelopes. For PDFs, check the Crop Box, as an incorrect Crop Box can also cause misalignment.
The ink is faint or smudged.
Check the type of paper. If the surface is smooth, the ink may have difficulty adhering. Switch the Paper Type setting to thick, or a suitable setting.
You can also reduce the printing speed, if your printer has the option. When the printer slows down, the ink has more time to set properly.
Content is missing edges.
You increase the safety margin, then move the content inside. Many printers have a non-printable area right up to the edge, so the design must leave some space.
Toshiba Thien Bang – specializing in supplying genuine photocopiers.
Printing envelopes might seem simple, but a single mistake in paper size or placement in the wrong tray can ruin an entire stack of envelopes. Instead of trying multiple times on your own, you can let Toshiba Thien Bang assist you in checking your equipment, rechecking drivers, paper trays, and printing parameters to ensure they are compatible with the specific type of envelope you are using.
Toshiba Thien Bang ‘s technical team works on addressing the root cause of problems, ensuring more stable machine operation during daily printing tasks. When the process is properly established from the start, printing envelopes, documents, or internal forms becomes smoother, less disruptive, and saves time for the entire office.
